魔改教程总结(一)
前言📇
- 本文参考博客魔改教程总结(一)、博客魔改教程总结(二)、【2023最新版】Hexo+github搭建个人博客并绑定个人域名、Iconfont Inject、糖果屋微调合集
- 本系列基本上都是各位大佬造好的轮子,具体参考 Fomalhaut大佬。其目的在于防止各位大佬的链接失效,且个人复习总结使用,如有侵权请联系删除。
- 本系列起始空白的虚拟机,一步一步搭建魔改页面,使用本地端口。若想部署在其它平台,可自寻查找。
- 鉴于每个人的根目录名称都不一样,本帖博客根目录一律以
[BlogRoot]指代。- 本帖涉及魔改源码的内容,会使用diff代码块标识,复制时请不要忘记删除前面的
+、-符号。- 因为
.pug和.styl以及.yml等对缩进要求较为严格,请尽量不要使用记事本等无法提供语法高亮的文本编辑器进行修改。- 本系列基于
Butterfly主题进行魔改方案编写,hexo 版本6.3.0,Butterfly 版本4.12.0。- 魔改会过程常常引入自定义的css与js文件,具体方法见方法见Hexo博客添加自定义css和js文件
博客搭建与魔改系列教程导航🚥🚥🚥
- 🎀hexo基础搭建教程(一)
- 🎆hexo基础搭建教程(二)
- 🎇魔改教程总结(一)⬅当前位置🛸
- 🧨魔改教程总结(二)
- ✨魔改教程总结(三)
生成文章唯一链接
点击查看教程
Hexo的默认文章链接格式是年,月,日,标题这种格式来生成的。如果你的标题是中文的话,那你的URL链接就会包含中文,
复制后的URL路径就是把中文变成了一大堆字符串编码,如果你在其他地方用这边文章的url链接,偶然你又修改了改文章的标题,那这个URL链接就会失效。为了给每一篇文章来上一个属于自己的链接,写下此教程,利用 hexo-abbrlink 插件,A Hexo plugin to generate static post link based on post titles ,来解决这个问题。 参考github官方: hexo-abbrlink 按照此教程配置完之后如下:
安装插件,在博客根目录
[BlogRoot]下打开终端,运行以下指令:1
npm install hexo-abbrlink --save
插件安装成功后,在根目录
[Blogroot]的配置文件_config.yml找到 permalink:1
2
3
4
5
6
7# permalink: :year/:month/:day/:title/
- permalink: :year/:month/:day/:title/
+ permalink: post/:abbrlink.html
+ abbrlink:
+ alg: crc32
+ rep: hex执行 hexo 三连
1
2
3
4
# git bash
hexo cl && hexo g && hexo s
# vscode
hexo cl; hexo g; hexo s每次执行三连后,文章会自动获取唯一链接
页面样式调节
点击查看教程
这个教程是通过css样式调节各个页面透明度、模糊度(亚克力效果)、圆角、边框样式等,看起来会更加舒适。
复制以下代码进去自定义的
custom.css文件1
2
3
4
5
6
7
8
9
10
11
12
13
14
15
16
17
18
19
20
21
22
23
24
25
26
27
28
29
30
31
32
33
34
35
36
37
38
39
40
41
42
43
44
45
46
47
48
49
50
51
52
53/*---------------- 页面样式调节---------------------- */
:root {
--trans-light: rgba(255, 255, 255, 0.88);
--trans-dark: rgba(25, 25, 25, 0.88);
--border-style: 1px solid rgb(169, 169, 169);
--backdrop-filter: blur(5px) saturate(150%);
}
/* 首页文章卡片 */
#recent-posts > .recent-post-item {
background: var(--trans-light);
backdrop-filter: var(--backdrop-filter);
border-radius: 25px;
border: var(--border-style);
}
/* 首页侧栏卡片 */
#aside-content .card-widget {
background: var(--trans-light);
backdrop-filter: var(--backdrop-filter);
border-radius: 18px;
border: var(--border-style);
}
/* 文章页、归档页、普通页面 */
div#post,
div#page,
div#archive {
background: var(--trans-light);
backdrop-filter: var(--backdrop-filter);
border: var(--border-style);
border-radius: 20px;
}
/* 导航栏 */
#page-header.nav-fixed #nav {
background: rgba(255, 255, 255, 0.75);
backdrop-filter: var(--backdrop-filter);
}
[data-theme="dark"] #page-header.nav-fixed #nav {
background: rgba(0, 0, 0, 0.7) ;
}
/* 夜间模式遮罩 */
[data-theme="dark"] #recent-posts > .recent-post-item,
[data-theme="dark"] #aside-content .card-widget,
[data-theme="dark"] div#post,
[data-theme="dark"] div#archive,
[data-theme="dark"] div#page {
background: var(--trans-dark);
}
/*---------------- 页面样式调节---------------------- */参数说明:
--trans-light:白天模式带透明度的背景色,如rgba(255, 255, 255, 0.88)底色是纯白色,其中0.88就透明度,在0-1之间调节,值越大越不透明;--trans-dark: 夜间模式带透明度的背景色,如rgba(25, 25, 25, 0.88)底色是柔和黑色,其中0.88就透明度,在0-1之间调节,值越大越不透明;--border-style: 边框样式,1px solid rgb(169, 169, 169)指宽度为1px的灰色实体边框;--backdrop-filter: 背景过滤器,如blur(5px) saturate(150%)表示饱和度为150%的、高斯模糊半径为5px的过滤器,这是亚克力效果的一种实现方法;- 大家可以根据自己喜好进行调节,不用拘泥于我的样式!
记住在主题配置文件
_config.butterfly.yml的inject配置项中引入该css文件:1
2
3inject:
head:
+ - <link rel="stylesheet" href="/css/custom.css">重启项目即可看见效果:
1
2
3
4# git bash
hexo cl && hexo g && hexo s
# vscode
hexo cl; hexo g; hexo s
一图流教程
点击查看教程
在
[BlogRoot]\source文件夹下新建一个文件夹css,该文件夹用于存放自定义的css样式,再新建一个名为custom.css,在里面写入以下代码:1
2
3
4
5
6
7
8
9
10
11
12
13
14
15
16
17
18
19
20
21
22
23
24
25
26
27
28
29
30
31
32
33
34
35
36
37
38
39
40
41
42
43
44
45
46/* 一图流教程 */
/* 白天模式头图与页脚遮罩 */
[data-theme="light"] #page-header::before {
background-color: rgba(0, 0, 0, 0.2) ;
z-index: -3;
}
[data-theme="light"] #footer::before {
background-color: rgba(0, 0, 0, 0.2) ;
z-index: -3;
}
/* 页脚与头图透明 */
#footer {
background: transparent ;
background-color: rgba(0, 0, 0, 0.2) ;
}
#page-header {
background: transparent ;
}
/* 夜间模式页脚遮罩隐藏 */
[data-theme="dark"] #footer::before {
background: transparent ;
}
/* 夜间模式页脚头部遮罩隐藏 */
[data-theme="dark"] #page-header::before {
background: transparent ;
}
/* 阅读模式 */
.read-mode #aside-content .card-widget {
background: rgba(158, 204, 171, 0.5) ;
}
.read-mode div#post {
background: rgba(158, 204, 171, 0.5) ;
}
/* 夜间模式下的阅读模式 */
[data-theme="dark"] .read-mode #aside-content .card-widget {
background: rgba(25, 25, 25, 0.9) ;
color: #ffffff;
}
[data-theme="dark"] .read-mode div#post {
background: rgba(25, 25, 25, 0.9) ;
color: #ffffff;
}
/* 一图流教程end */在主题配置文件
[BlogRoot]\_config.butterfly.yml文件中的inject配置项的head子项加入以下代码,代表引入刚刚创建的custom.css文件(这是相对路径的写法)1
2
3inject:
head:
- <link rel="stylesheet" href="/css/custom.css" media="defer" onload="this.media='all'">在主题配置文件
[BlogRoot]\_config.butterfly.yml文件中的index_img和footer_bg配置项取消头图与页脚图的加载项避免冗余加载1
2
3
4
5# The banner image of home page
index_img:
# Footer Background
footer_bg: false部分人反映一图流改完了背景图也没了,那大概率是你之前没设置背景图。在主题配置文件
[BlogRoot]\_config.butterfly.yml文件中的background配置项设置背景图1
background: url(/img/home_bg.webp)
首页分类磁贴1.0(小冰)
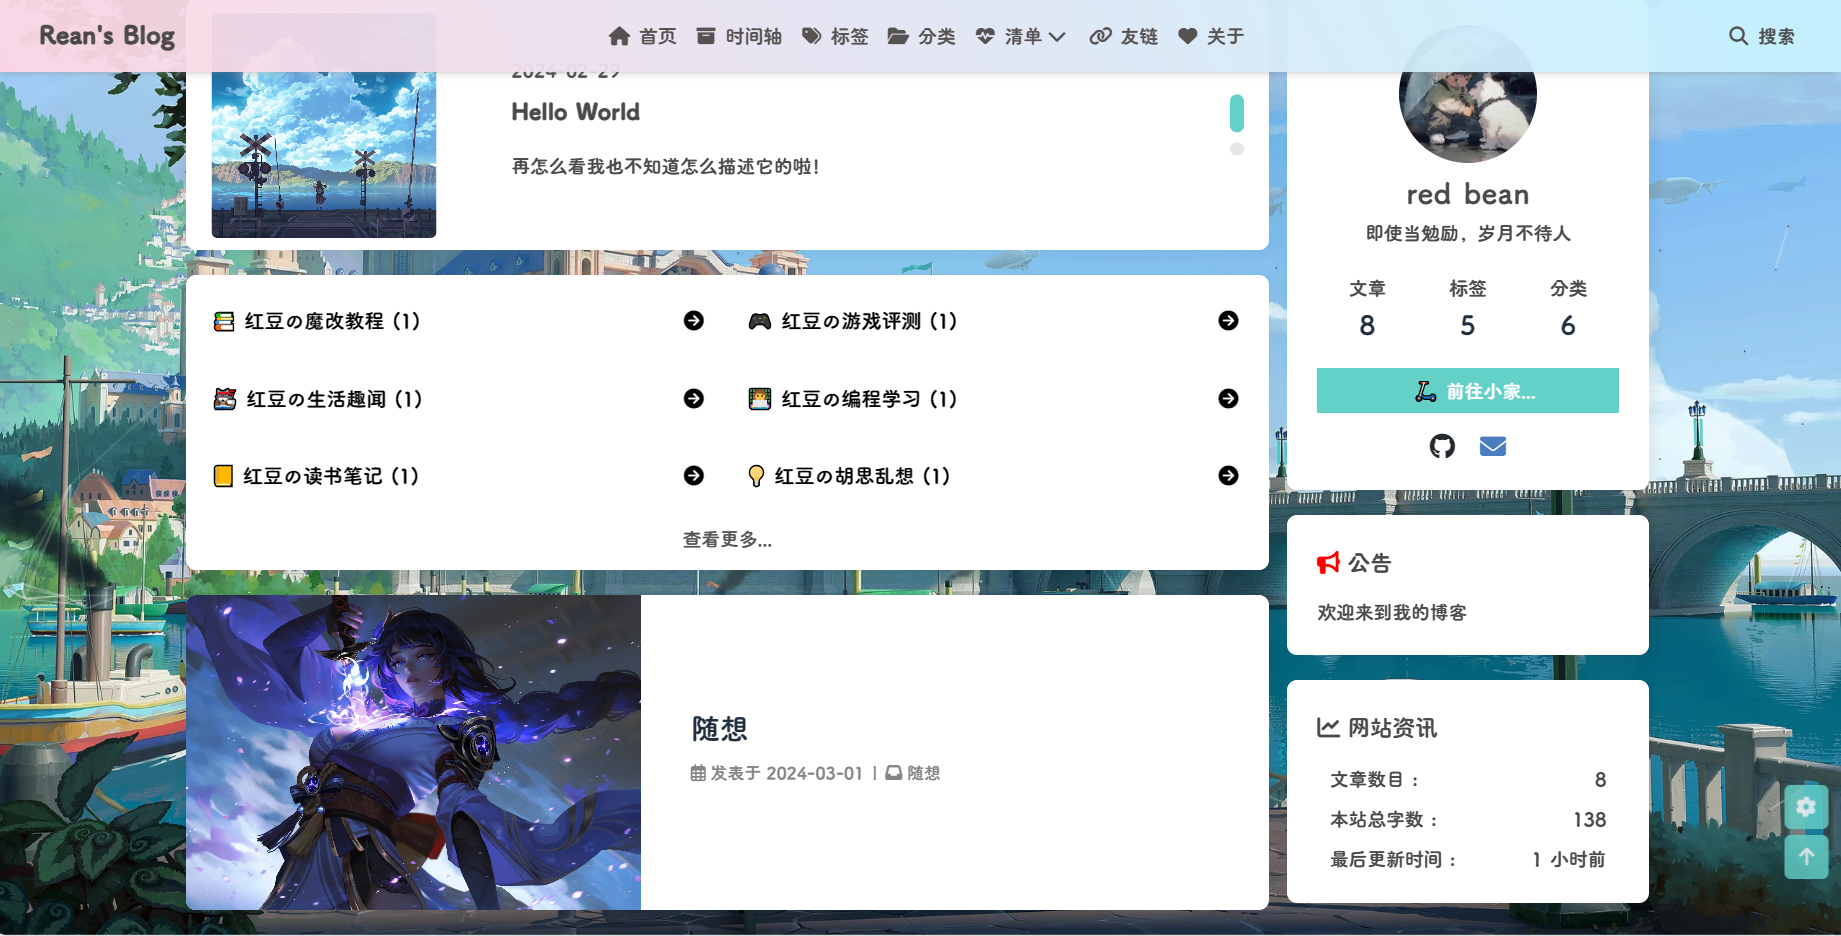
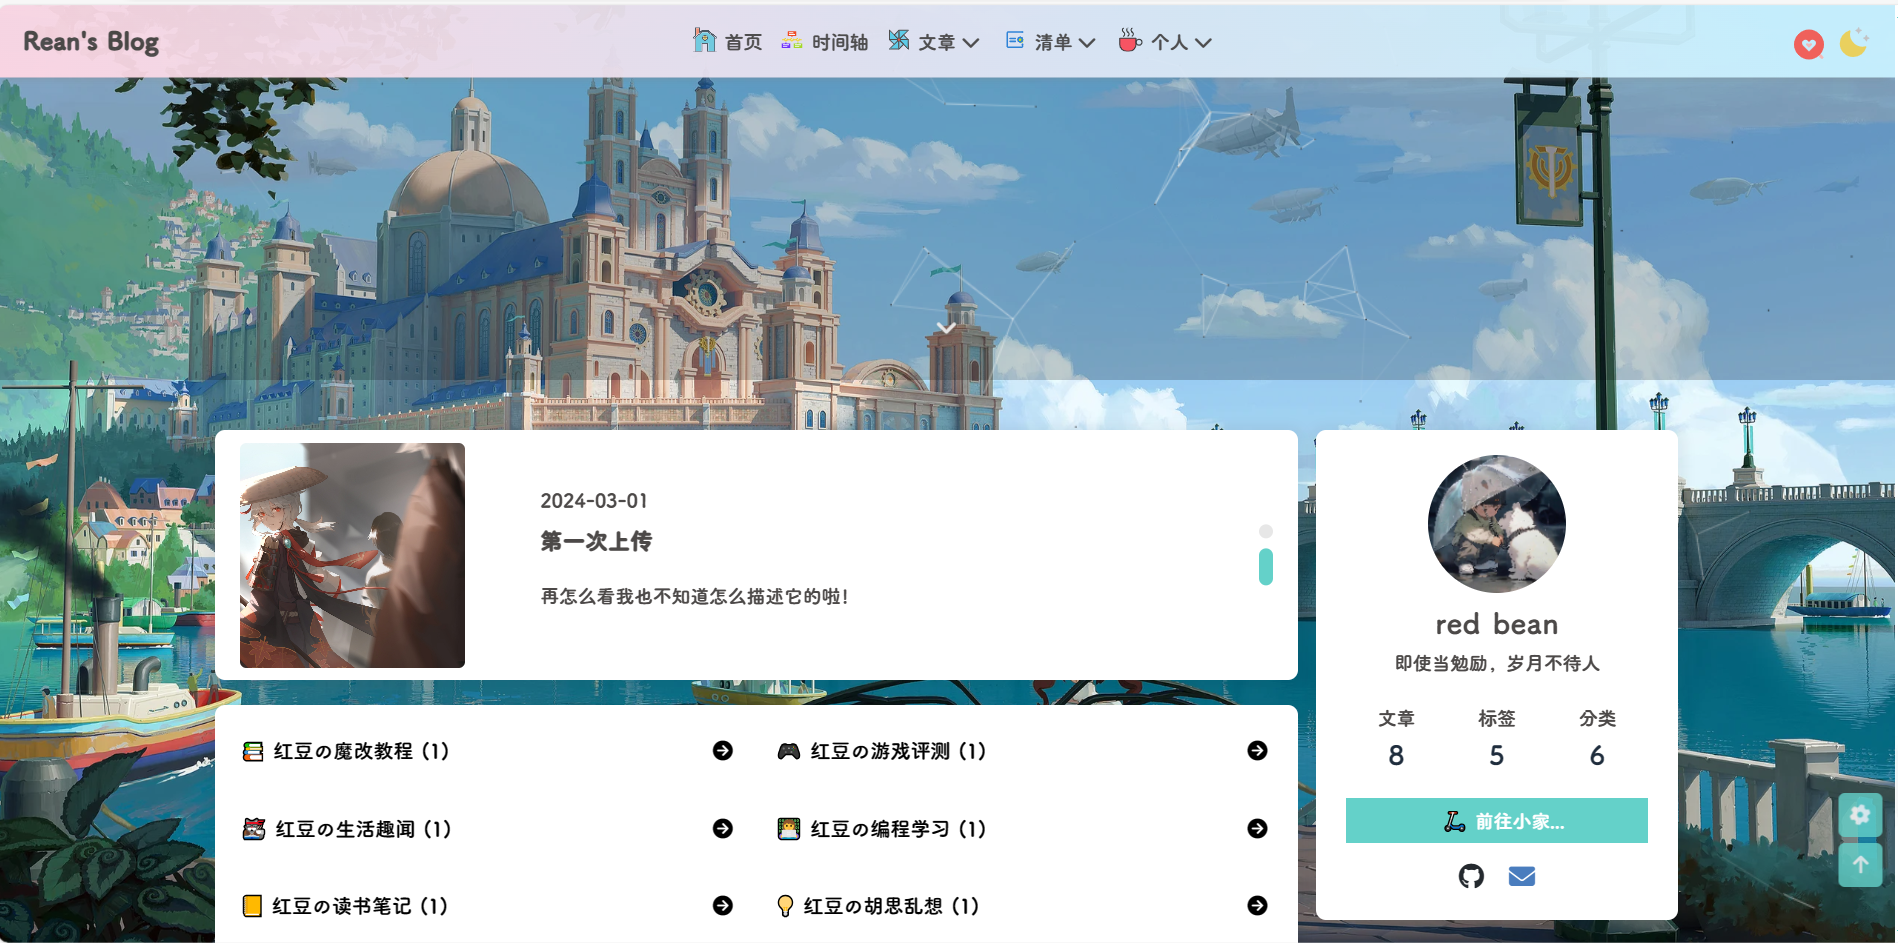
点击查看教程
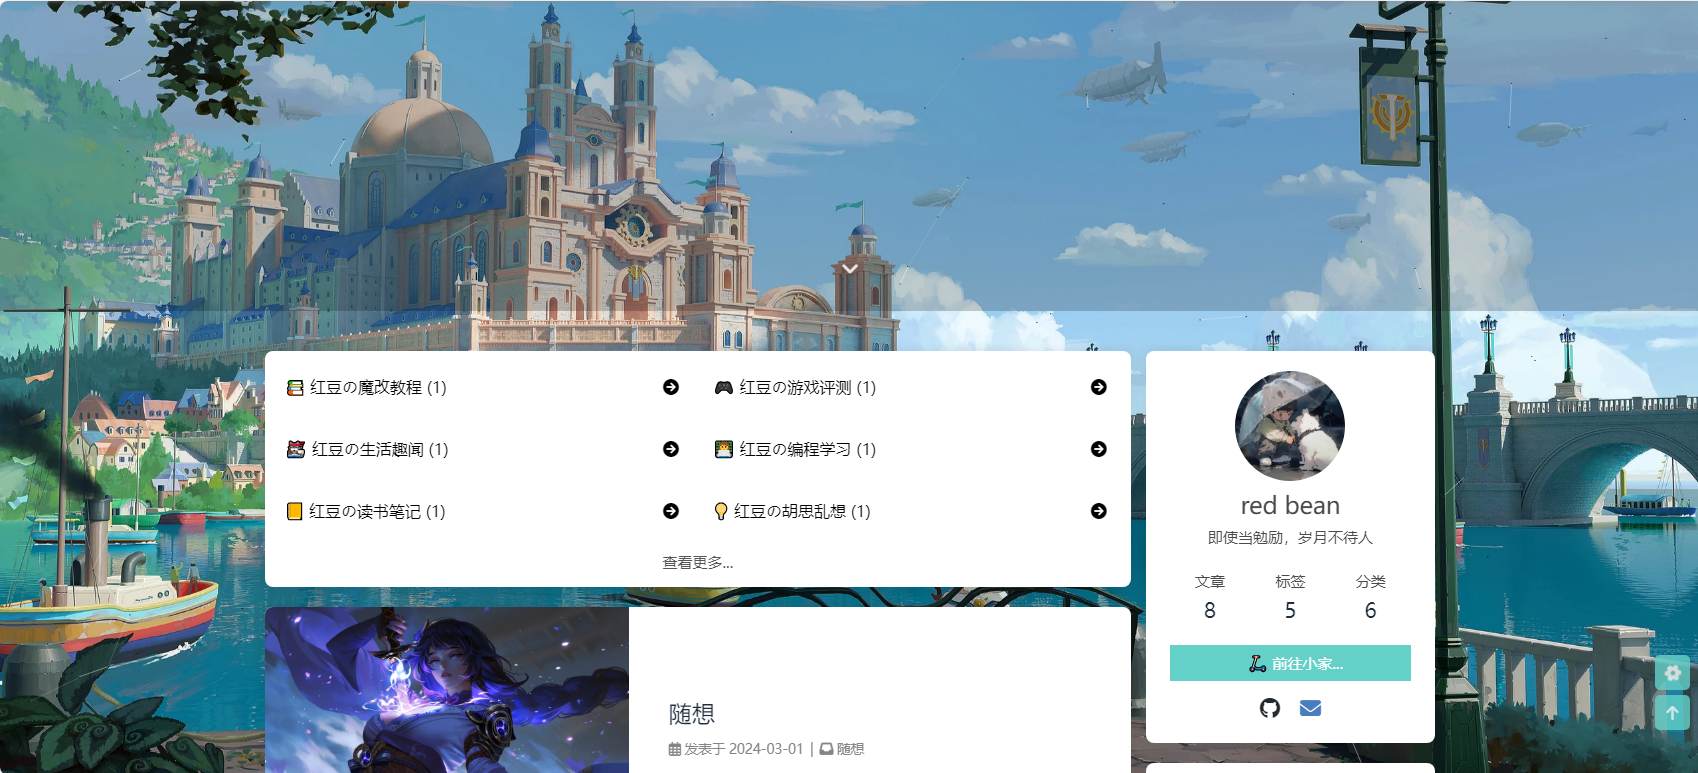
这个插件主要实现了以下功能:
- 自定义 tags 或 categories 的排列和展示
- 自定义 tags 或 categories 的展示图标,名称
- 自定义排列的行数,默认 2 行
这个插件在 hexo 7.0.0 版本会报错,回退版本到 hexo 6.3.0 即可
教程:
在博客根目录
[BlogRoot]下打开终端,运行以下指令:1
npm i hexo-magnet --save
注意,一定要加
--save,不然本地预览的时候可能不会显示!!!在网站配置文件
_config.yml新增以下项 (注意不是主题配置文件),这里的分类名字必须和你文章的分类名字一一对应:1
2
3
4
5
6
7
8
9
10
11
12
13
14
15
16
17
18
19
20
21
22
23
24
25
26
27
28
29
30
31
32
33
34
35
36magnet:
enable: true
priority: 2
enable_page: /
type: categories
devide: 2
display:
- name: 教程
display_name: 小冰の魔改教程
icon: 📚
- name: 游戏评测
display_name: 小冰の游戏评测
icon: 🎮
- name: 生活趣闻
display_name: 小冰の生活趣闻
icon: 🐱👓
- name: vue
display_name: 小冰の编程学习
icon: 👩💻
- name: 学习
display_name: 小冰の读书笔记
icon: 📒
- name: 随想
display_name: 小冰の胡思乱想
icon: 💡
color_setting:
text_color: black
text_hover_color: white
background_color: "#rgb(233,233,233)"
background_hover_color: "rgb(115,213,206)"
layout:
type: id
name: recent-posts
index: 0
temple_html: '<div class="recent-post-item" style="width:100%;height: auto"><div id="catalog_magnet">${temple_html_item}</div></div>'
plus_style: ""配置项的含义:
enable
参数:true/false
含义:是否开启插件enable_page
参数:/
含义:路由地址,如 / 代表主页。/me/ 代表自我介绍页等等priority
参数:1
含义:插件的叠放顺序,数字越大,叠放约靠前。type
参数:categories/tags
含义:选择筛选分类还是标签devide
参数:2
含义:表示分隔的列数,2 表示分为两列展示display
参数:
1
2
3- name: 教程 # 这里是tags或者categories的名称
display_name: 小冰の魔改教程 # 这里是替换的名称
icon: 📚 # 这里是展示的图标含义:配置项,可自行设置,按照设置的顺序展示
color_setting
参数:
1
2
3
4text_color: black # 文字默认颜色
text_hover_color: white # 文字鼠标悬浮颜色
background_color: "#f2f2f2" # 文字背景默认颜色
background_hover_color: "#b30070" # 文字背景悬浮颜色含义:颜色配置项,可自行设置
layout
参数:type; (class&id)
参数:name;
参数:index;(数字)
含义:如果说 magnet 是一幅画,那么这个 layout 就是指定了哪面墙来挂画
而在 HTML 的是世界里有两种墙分别 type 为 id 和 class。
其中在定义 class 的时候会出现多个 class 的情况,这时就需要使用 index,确定是哪一个。
最后墙的名字即是 name;1
2
3
4
5
6
7
8<div name="我是墙" id="recent-posts">
<!-- id=>type recent-posts=>name -->
<div name="我是画框">
<div name="我是纸">
<!--这里通过js挂载magnet,也就是画画-->
</div>
</div>
</div>temple_html
参数:html 模板字段
含义:包含挂载容器1
2
3
4
5<div class="recent-post-item" style="width:100%;height: auto"> <!--文章容器-->
<div id="catalog_magnet"> <!--挂载容器-->
${temple_html_item}
</div>
</div>plus_style
参数:“”
含义:提供可自定义的 style,如加入黑夜模式。
执行 hexo 三连
1
2
3
4# git bash
hexo cl && hexo g && hexo s
# vscode
hexo cl; hexo g; hexo s我们可以看到黑夜模式看起来特别的别扭,因此还要做一下黑夜模式的颜色适配,在
custom.css文件中添加以下代码适配黑夜模式(具体颜色可以自己调节):1
2
3
4
5
6
7
8
9
10
11
12
13
14/* 小冰分类分类磁铁黑夜模式适配 */
/* 一般状态 */
[data-theme="dark"] .magnet_link_context {
background: #1e1e1e;
color: antiquewhite;
border-radius: 8px;
}
/* 鼠标悬浮状态 */
[data-theme="dark"] .magnet_link_context:hover {
background: rgb(54,185,176);
color: #f2f2f2;
border-radius: 8px;
}
/* 首页分类磁贴end */
如果点击链接跳转错误,检查:
categories的名称和 name 是否一致
观察浏览器地址发现跳转到了
http://example.com,修改_config.yml1
2
3
4# URL
## Set your site url here. For example, if you use GitHub Page, set url as 'https://username.github.io/project'
#url: http://example.com
url: http://localhost:4000后期可以将这个地址改为托管平台的地址。
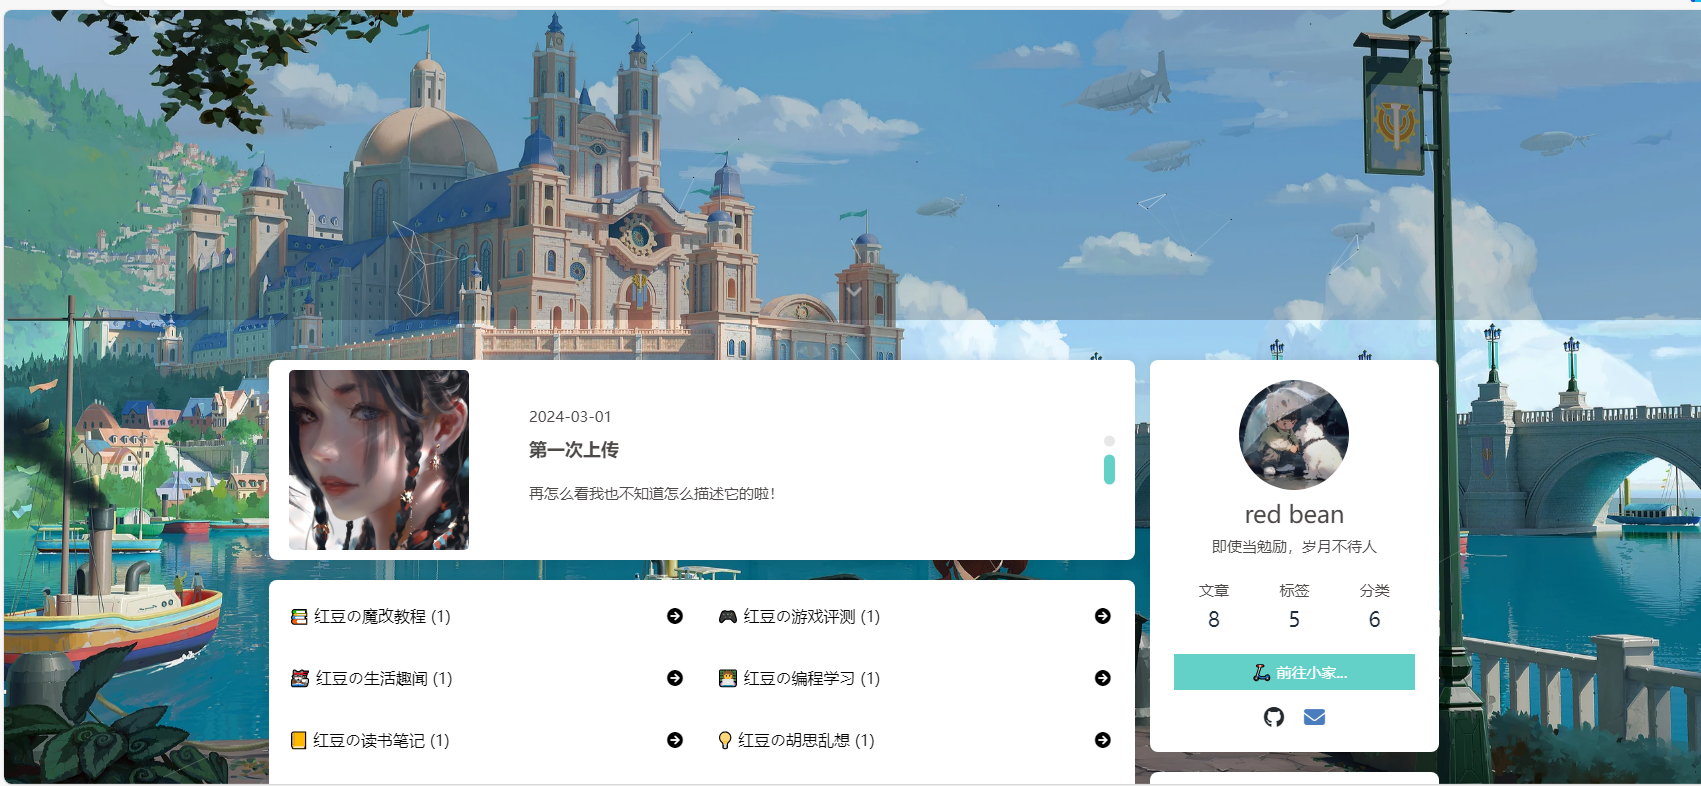
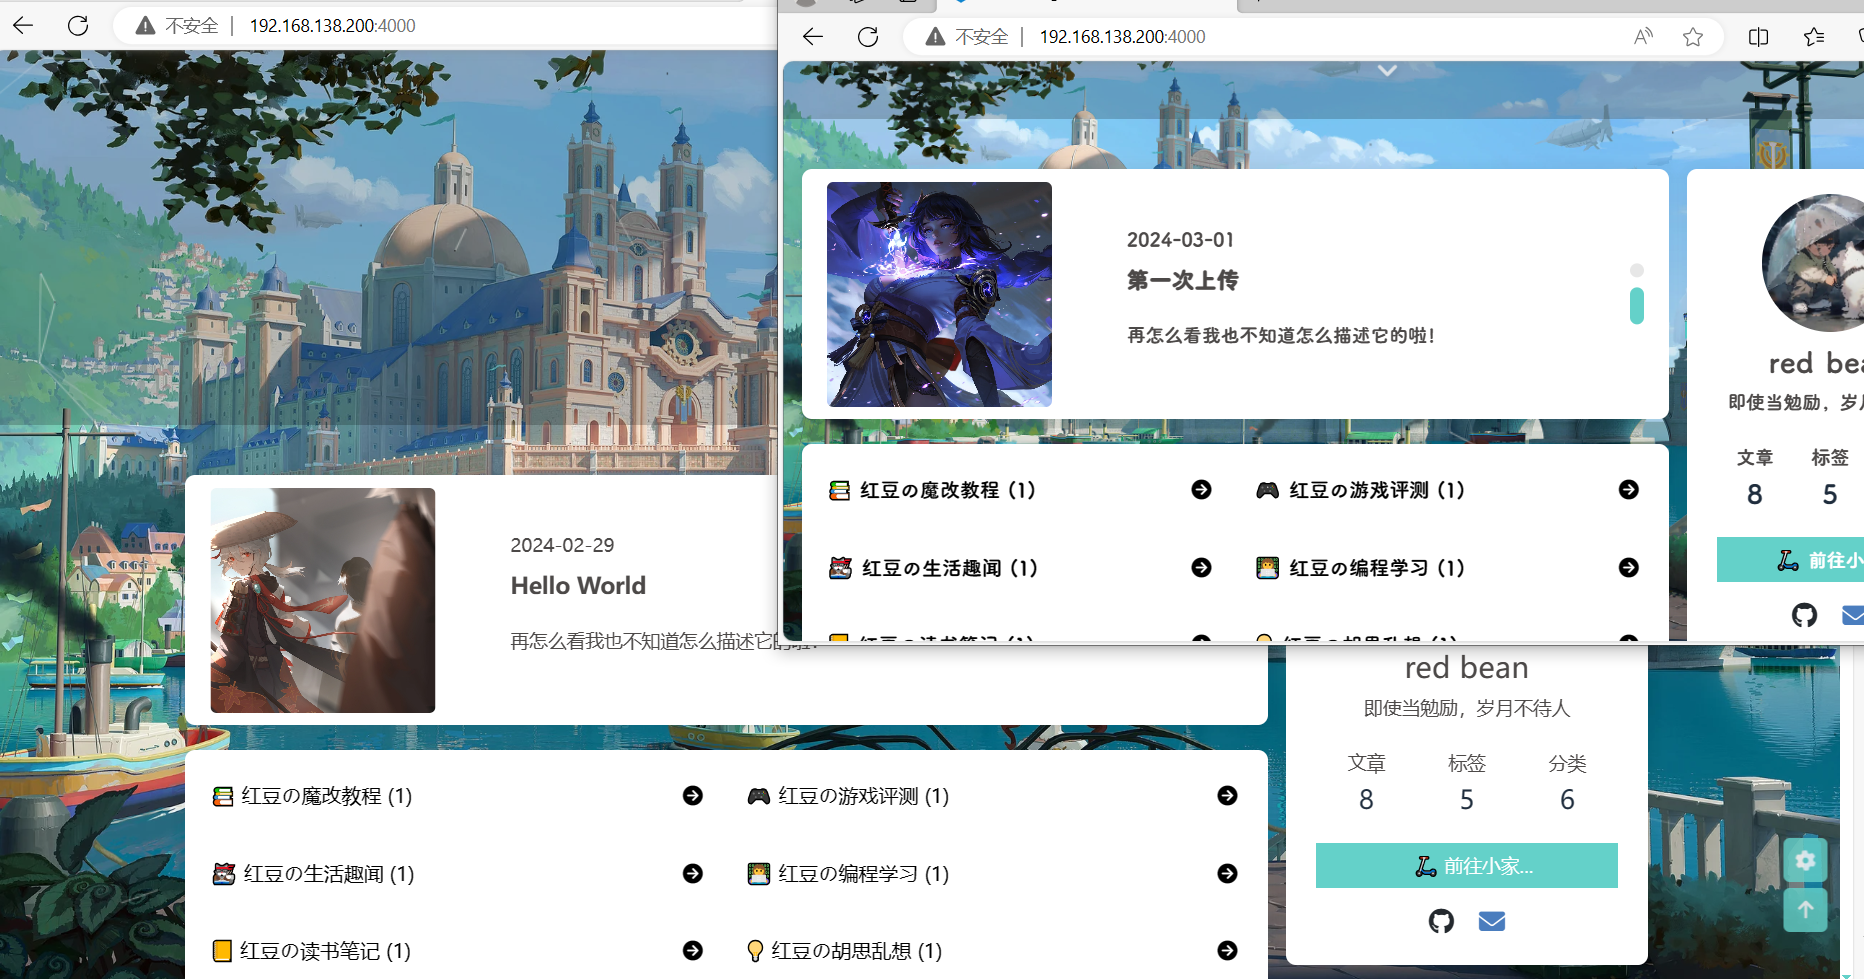
文章置顶滚动栏(店长)
点击查看教程
安装插件,在博客根目录
[BlogRoot]下打开终端,运行以下指令:1
npm install hexo-butterfly-swiper --save
添加配置信息,以下为写法示例
在站点配置文件_config.yml或者主题配置文件_config.butterfly.yml中添加1
2
3
4
5
6
7
8
9
10
11
12
13
14
15
16
17
18
19
20
21# hexo-butterfly-swiper
# 首页轮播图
# see https://akilar.top/posts/8e1264d1/
swiper:
enable: true # 开关
priority: 1 #过滤器优先权
enable_page: / # 应用页面
timemode: date #date/updated
layout: # 挂载容器类型
type: id
name: recent-posts
index: 0
default_descr: 再怎么看我也不知道怎么描述它的啦!
# swiper_css: /css/swiper.min.css #swiper css依赖
# swiper_js: /js/swiper.min.js #swiper js依赖
# custom_css: /css/swiperstyle.css # 适配主题样式补丁
# custom_js: /js/swiper_init.js # swiper初始化方法
swiper_css: https://npm.elemecdn.com/hexo-butterfly-swiper/lib/swiper.min.css #swiper css依赖
swiper_js: https://npm.elemecdn.com/hexo-butterfly-swiper/lib/swiper.min.js #swiper js依赖
custom_css: https://npm.elemecdn.com/hexo-butterfly-swiper/lib/swiperstyle.css # 适配主题样式补丁
custom_js: https://npm.elemecdn.com/hexo-butterfly-swiper/lib/swiper_init.js # swiper初始化方法参数释义
| 参数 | 备选值/类型 | 释义 |
|---|---|---|
| priority | number | 【可选】过滤器优先级,数值越小,执行越早,默认为10,选填 |
| enable | true/false | 【必选】控制开关 |
| enable_page | path/all | 【可选】填写想要应用的页面的相对路径(即路由地址),如根目录就填’/‘,分类页面就填’/categories/‘。若要应用于所有页面,就填’all’,默认为all |
| timemode | date/updated | 【可选】时间显示,date为显示创建日期,updated为显示更新日期,默认为date |
| layout.type | id/class | 【可选】挂载容器类型,填写id或class,不填则默认为id |
| layout.name | text | 【必选】挂载容器名称 |
| layout.index | 0和正整数 | 【可选】前提是layout.type为class,因为同一页面可能有多个class,此项用来确认究竟排在第几个顺位 |
| default_descr | text | 默认文章描述 |
| swiper_css | url | 【可选】自定义的swiper依赖项css链接 |
| swiper_js | url | 【可选】自定义的swiper依赖项加js链接 |
| custom_css | url | 【可选】适配主题样式补丁 |
| custom_js | url | 【可选】swiper初始化方法 |
使用方法:在文章的front_matter中添加swiper_index配置项即可。
1 | --- |
自定义字体
点击查看教程
声明:非商免字体未经授权仅限个人使用,不得用于商业用途!
准备好字体文件后,在
[BlogRoot]\source\css\custom.css(没有就自己创建)中添加以下代码:1
2
3
4
5
6
7
8
9
10
11
12
13
14/*------------- 自定义字体 ------------------*/
@font-face {
/* 为载入的字体取名字(随意) */
font-family: 'redbean';
/* 字体文件地址(相对或者绝对路径都可以,/source 为根目录 /) */
src: url(/font/ZhuZiAWan.woff2);
/* 定义加粗样式(加粗多少) */
font-weight: normal;
/* 定义字体样式(斜体/非斜体) */
font-style: normal;
/* 定义显示样式 */
font-display: block;
}
/*------------- 自定义字体end ------------------*/各个属性的定义:
- font-family属性值中使用webfont来声明使用的是服务器端字体,即设置文本的字体名称。
- src属性值中首先指定了字体文件所在的路径。
- format声明字体文件的格式,可以省略文件格式的声明,单独使用src属性值。
- font-style:设置文本样式。取值:normal:不使用斜体;italic:使用斜体;oblique:使用倾斜体;inherit:从父元素继承。
- 支持格式:.eot(老版本IE),.otf,.ttf,.woff,*.woff2(推荐)
在主题配置文件
_config.butterfly.yml中的font配置项以及blog_title_font配置项写上你刚刚引入的字体名称,系统会根据先后次序从前到后依次加载这些字体:1
2
3
4
5
6
7
8
9
10
11
12
13# Global font settings
# Don't modify the following settings unless you know how they work (非必要不要修改)
font:
global-font-size: '15px'
code-font-size: '14px'
font-family: redbean, Consolas, -apple-system, 'Quicksand', 'Nimbus Roman No9 L', 'PingFang SC', 'Hiragino Sans GB', 'Noto Serif SC', 'Microsoft Yahei', 'WenQuanYi Micro Hei', 'ST Heiti', sans-serif;
code-font-family: Consolas, redbean, "Microsoft YaHei", Menlo, "PingFang SC", "Microsoft JhengHei", sans-serif
# Font settings for the site title and site subtitle
# 左上角網站名字 主頁居中網站名字
blog_title_font:
font_link:
font-family: var(--global-font)重启项目即可看到
1
2
3
4# git bash
hexo cl && hexo g && hexo s
# vscode
hexo cl; hexo g; hexo s
wowjs动画(首页卡片弹出的动画)
点击查看教程

安装插件,在博客根目录
[BlogRoot]下打开终端,运行以下指令:1
npm install hexo-butterfly-wowjs --save
添加配置信息,以下为写法示例
在站点配置文件_config.yml或者主题配置文件_config.butterfly.yml中添加1
2
3
4
5
6
7
8
9
10
11
12
13
14
15
16
17
18
19
20
21
22
23
24
25
26
27
28
29
30
31
32
33
34
35
36
37
38
39
40
41
42
43
44
45
46
47
48
49
50
51
52
53
54
55
56
57
58
59
60# wowjs动画特效
# see https://www.npmjs.com/package/hexo-butterfly-wowjs
wowjs:
enable: true #控制动画开关。true是打开,false是关闭
priority: 10 #过滤器优先级
mobile: false #移动端是否启用,默认移动端禁用
animateitem:
- class: recent-post-item #必填项,需要添加动画的元素的class
style: animate__zoomIn # animate__zoomIn #必填项,需要添加的动画
duration: 2s #选填项,动画持续时间,单位可以是ms也可以是s。例如3s,700ms。
delay: 200ms #选填项,动画开始的延迟时间,单位可以是ms也可以是s。例如3s,700ms。
offset: 30 #选填项,开始动画的距离(相对浏览器底部)
iteration: 1 #选填项,动画重复的次数
# 置顶滚动栏
# - class: blog-slider swiper-container-fade swiper-container-horizontal
# style: animate__zoomIn
# duration: 1.5s
# delay: 200ms
# offset: 30
# iteration: 1
# 分类磁贴
# - class: catalog_magnet
# style: animate__zoomIn
# duration: 1.5s·
# delay: 200ms
# offset: 30
# iteration: 1
# 侧边卡片栏
- class: card-widget
style: animate__zoomIn
duration: 2s
delay: 200ms
offset: 30
iteration: 1
# 分页按钮
# - class: pagination
# style: animate__jackInTheBox
# duration: 1.5s
# delay: 200ms
# offset: 30
# iteration: 1
# 友链卡片
# - class: flink-list-card
# style: animate__flipInY
# duration: 3s
# - class: flink-list-card
# style: animate__animated
# duration: 3s
# - class: article-sort-item
# style: animate__slideInRight
# duration: 1.5s
# - class: site-card
# style: animate__flipInY
# duration: 3s
# - class: site-card
# style: animate__animated
# duration: 3s
animate_css: https://npm.elemecdn.com/hexo-butterfly-wowjs/lib/animate.min.css
wow_js: https://npm.elemecdn.com/hexo-butterfly-wowjs/lib/wow.min.js
wow_init_js: https://npm.elemecdn.com/hexo-butterfly-wowjs/lib/wow_init.js参数释义
| 参数 | 备选值/类型 | 释义 |
|---|---|---|
| enable | true/false | 【必选】控制开关 |
| priority | number | 【可选】过滤器优先级,数值越小,执行越早,默认为10,选填 |
| mobile | true/false | 控制移动端是否启用,默认移动端禁用 |
| animateitem.class | class | 【可选】添加动画类名,只支持给class添加 |
| animateitem.style | text | 【可选】动画样式,具体类型参考animate.css |
| animateitem.duration | time,单位为s或ms | 【可选】动画持续时间,单位可以是ms也可以是s。例如3s,700ms。 |
| animateitem.delay | time,单位为s或ms | 【可选】动画开始的延迟时间,单位可以是ms也可以是s。例如3s,700ms。 |
| animateitem.offset | number,单位为px | 【可选】开始动画的距离(相对浏览器底部)。 |
| animateitem.iteration | number,单位为s或ms | 【可选】动画重复的次数 |
| animate_css | URL | 【可选】animate.css的CDN链接,默认为https://npm.elemecdn.com/hexo-butterfly-wowjs/lib/animate.min.css |
| wow_js | URL | 【可选】wow.min.js的CDN链接,默认为https://npm.elemecdn.com/hexo-butterfly-wowjs/lib/wow.min.js |
| wow_init_js | URL | 【可选】wow_init.js的CDN链接,默认为https://npm.elemecdn.com/hexo-butterfly-wowjs/lib/wow_init.js |
wowjs详细用法见原帖。
配置手机PC页面白天黑夜共四个背景图(店长)
点击查看教程
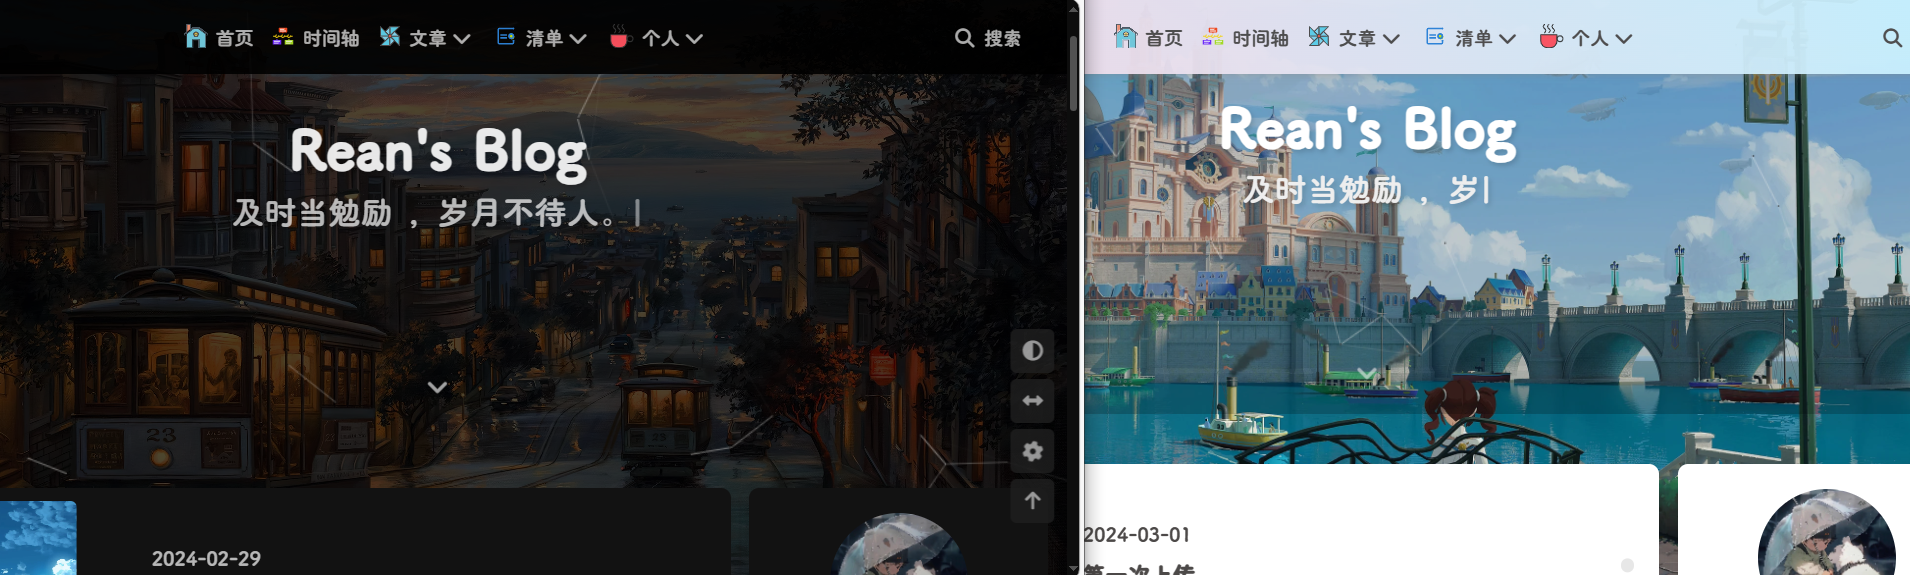
详见:糖果屋微调合集
首先是PC端的白天黑夜双背景,修改
[BlogRoot]\themes\butterfly\layout\includes\layout.pug,大概在14,15行左右1
2
3
4
5
6
7
8
9
10
11
12
13
14
15
16
17
18
19
20
21
22+ - var DefaultBg = page.defaultbg ? page.defaultbg : theme.background.default
+ - var DDMBg = theme.background.darkmode ? theme.background.darkmode : DefaultBg
+ - var DarkmodeBg = page.darkmodebg ? page.darkmodebg : DDMBg
if theme.background
#web_bg
+ if page.defaultbg || page.darkmodebg
+ style.
+ #web_bg{
+ background: #{DefaultBg} !important;
+ background-attachment: local!important;
+ background-position: center!important;
+ background-size: cover!important;
+ background-repeat: no-repeat!important;
+ }
+ [data-theme="dark"]
+ #web_bg{
+ background: #{DarkmodeBg} !important;
+ background-attachment: local!important;
+ background-position: center!important;
+ background-size: cover!important;
+ background-repeat: no-repeat!important;
+ }再是实现手机端的白天黑夜双背景,在
[BlogRoot]\themes\butterfly\source\css\_layout目录下新建一个web-bg.styl文件,写入以下内容:1
2
3
4
5
6
7
8
9
10
11
12
13
14
15
16
17
18
19
20
21
22
23
24$web-bg-night = hexo-config('background.darkmode') ? unquote(hexo-config('background.darkmode')) : $web-bg
$mobile-bg-day = hexo-config('background.mobileday') ? unquote(hexo-config('background.mobileday')) : $web-bg
$mobile-bg-night = hexo-config('background.mobilenight') ? unquote(hexo-config('background.mobilenight')) : $web-bg-night
[data-theme="dark"]
#web_bg
background: $web-bg-night
background-attachment: local
background-position: center
background-size: cover
background-repeat: no-repeat
@media screen and (max-width: 800px)
#web_bg
background: $mobile-bg-day !important
background-attachment: local !important
background-position: center !important
background-size: cover !important
background-repeat: no-repeat !important
[data-theme="dark"]
#web_bg
background: $mobile-bg-night !important
background-attachment: local !important
background-position: center !important
background-size: cover !important
background-repeat: no-repeat !important然后还要修改一下
[BlogRoot]\themes\butterfly\source\css\var.styl,大约35行的位置1
2
3
4$text-line-height = 2
- $web-bg = hexo-config('background') && unquote(hexo-config('background'))
+ $web-bg = hexo-config('background.default') && unquote(hexo-config('background.default'))
$index_top_img_height = hexo-config('index_top_img_height') ? convert(hexo-config('index_top_img_height')) : 100vh再修改一下配置项,在
[BlogRoot]/_config.butterfly.yml中找到background配置项,内容改为:1
2
3
4
5
6
7
8# Website Background (設置網站背景)
# can set it to color or image (可設置圖片 或者 顔色)
# The formal of image: url(http://xxxxxx.com/xxx.jpg)
background:
default: url(/img/home_bg.webp) #【必选】默认背景
darkmode: url(/img/dark_bg.webp) #【可选】PC端夜间模式背景
mobileday: url(/img/m2.webp) #【可选】移动端日间默认背景
mobilenight: url(/img/m1.webp) #【可选】移动端夜间模式背景当开了
Pjax,还要再把#web_bg加到pjax选择器中。修改[BlogRoot]\themes\butterfly\layout\includes\third-party\pjax.pug1
2
3
4
5
6
7
8
9
10
11script(src=url_for(theme.CDN.pjax))
script.
let pjaxSelectors = [
'title',
'#config-diff',
'#body-wrap',
'#rightside-config-hide',
'#rightside-config-show',
+ '#web_bg',
'.js-pjax'
]
Vue+Element 样式弹窗
点击查看教程
在主题配置文件
[BlogRoot]\_config.butterfly.yml中 引入Vue和Element相关依赖:1
2
3
4
5
6inject:
head:
+ - <link rel="stylesheet" href="https://unpkg.zhimg.com/element-ui@2.15.6/lib/theme-chalk/index.css"> # 引入组件库(f12)
bottom:
+ - <script async src="https://cdn1.tianli0.top/npm/vue@2.6.14/dist/vue.min.js"></script> # 引入VUE(f12)
+ - <script async src="https://cdn1.tianli0.top/npm/element-ui@2.15.6/lib/index.js"></script> # 引入ElementUI(f12)在
[BlogRoot]/source/js下新建 copy.js,没有 js 目录就新建,把下面代码全部复制进去:1
2
3
4
5
6
7
8
9
10
11
12
13
14
15
16
17
18
19
20
21
22
23
24
25
26
27
28
29
30
31
32
33
34
35
36
37
38
39
40
41
42
43
44
45
46
47
48
49
50/* 禁用f12与按键防抖 start */
// 防抖全局计时器
let TT = null; //time用来控制事件的触发
// 防抖函数:fn->逻辑 time->防抖时间
function debounce(fn, time) {
if (TT !== null) clearTimeout(TT);
TT = setTimeout(fn, time);
}
// 复制提醒
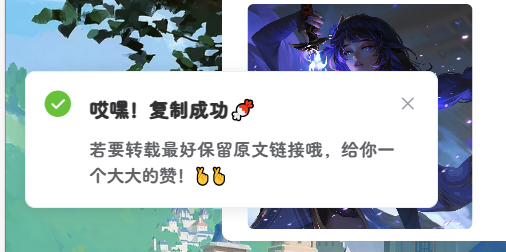
document.addEventListener("copy", function () {
debounce(function () {
new Vue({
data: function () {
this.$notify({
title: "哎嘿!复制成功🍬",
message: "若要转载最好保留原文链接哦,给你一个大大的赞!🤞🤞",
position: 'top-left',
offset: 50,
showClose: true,
type: "success",
duration: 5000
});
}
})
}, 300);
})
// f12提醒但不禁用
document.onkeydown = function (e) {
if (123 == e.keyCode || (e.ctrlKey && e.shiftKey && (74 === e.keyCode || 73 === e.keyCode || 67 === e.keyCode)) || (e.ctrlKey && 85 === e.keyCode)) {
debounce(function () {
new Vue({
data: function () {
this.$notify({
title: "你已被发现😜",
message: "小伙子,扒源记住要遵循GPL协议!",
position: 'top-left',
offset: 50,
showClose: true,
type: "warning",
duration: 5000
});
}
})
}, 300);
}
};
/* 禁用f12与按键防抖 end */notify:弹窗类型,可以替换为message(信息提示)和confirm(二次确认提示)title:弹窗标题,可以改为自定义标题message:弹窗信息,可以改为自定义内容position:弹出位置,bottom、top和left、right两两组合offset:偏移量,简单可以理解为与边界的距离showClose:是否显示关闭按钮type:提示类型,可选success/warning/info/error等duration:停留时间,弹出停留至消失的时间,单位ms详见:Vue中常用的提示信息
在
_config.butterfly.yml中的 inject 引入 copy.js1
2
3inject:
bottom:
+ - <script async src="/js/copy.js"></script> # 复制时利用 element-ui 提醒
夜间模式切换动画
点击查看教程

需要前置:vue+element 引入
新建
[BlogRoot]\themes\butterfly\layout\includes\custom\sun_moon.pug,这部分其实实质上就是一个svg文件,通过js操作它的旋转显隐,淡入淡出实现动画效果。1
2
3
4
5
6
7
8
9svg(aria-hidden='true', style='position:absolute; overflow:hidden; width:0; height:0')
symbol#icon-sun(viewBox='0 0 1024 1024')
path(d='M960 512l-128 128v192h-192l-128 128-128-128H192v-192l-128-128 128-128V192h192l128-128 128 128h192v192z', fill='#FFD878', p-id='8420')
path(d='M736 512a224 224 0 1 0-448 0 224 224 0 1 0 448 0z', fill='#FFE4A9', p-id='8421')
path(d='M512 109.248L626.752 224H800v173.248L914.752 512 800 626.752V800h-173.248L512 914.752 397.248 800H224v-173.248L109.248 512 224 397.248V224h173.248L512 109.248M512 64l-128 128H192v192l-128 128 128 128v192h192l128 128 128-128h192v-192l128-128-128-128V192h-192l-128-128z', fill='#4D5152', p-id='8422')
path(d='M512 320c105.888 0 192 86.112 192 192s-86.112 192-192 192-192-86.112-192-192 86.112-192 192-192m0-32a224 224 0 1 0 0 448 224 224 0 0 0 0-448z', fill='#4D5152', p-id='8423')
symbol#icon-moon(viewBox='0 0 1024 1024')
path(d='M611.370667 167.082667a445.013333 445.013333 0 0 1-38.4 161.834666 477.824 477.824 0 0 1-244.736 244.394667 445.141333 445.141333 0 0 1-161.109334 38.058667 85.077333 85.077333 0 0 0-65.066666 135.722666A462.08 462.08 0 1 0 747.093333 102.058667a85.077333 85.077333 0 0 0-135.722666 65.024z', fill='#FFB531', p-id='11345')
path(d='M329.728 274.133333l35.157333-35.157333a21.333333 21.333333 0 1 0-30.165333-30.165333l-35.157333 35.157333-35.114667-35.157333a21.333333 21.333333 0 0 0-30.165333 30.165333l35.114666 35.157333-35.114666 35.157334a21.333333 21.333333 0 1 0 30.165333 30.165333l35.114667-35.157333 35.157333 35.157333a21.333333 21.333333 0 1 0 30.165333-30.165333z', fill='#030835', p-id='11346')新建
[BlogRoot]\themes\butterfly\source\css\_layout\sun_moon.styl1
2
3
4
5
6
7
8
9
10
11
12
13
14
15
16
17
18
19
20
21
22
23
24
25
26
27
28
29
30
31
32
33
34
35
36
37
38
39
40
41
42
43
44
45
46
47
48
49
50
51
52
53
54
55
56
57
58
59
60
61
62
63
64
65
66
67
68
69
70
71
72
73
74
75
76
77
78
79
80
81
82
83
84
85
86
87
88
89
90
91
92
93
94
95.Cuteen_DarkSky,
.Cuteen_DarkSky:before
content ''
position fixed
left 0
right 0
top 0
bottom 0
z-index 88888888
.Cuteen_DarkSky
background linear-gradient(to top, #f8cd71 0, #5bfde9 80%)
&:before
transition 2s ease all
opacity 0
background linear-gradient(to top, #30cfd0 0, #330867 100%)
.DarkMode
.Cuteen_DarkSky
&:before
opacity 1
.Cuteen_DarkPlanet
z-index 99999999
position fixed
left -50%
top -50%
width 200%
height 200%
-webkit-animation CuteenPlanetMove 2s cubic-bezier(0.7, 0, 0, 1)
animation CuteenPlanetMove 2s cubic-bezier(0.7, 0, 0, 1)
transform-origin center bottom
@-webkit-keyframes CuteenPlanetMove {
0% {
transform: rotate(0);
}
to {
transform: rotate(360deg);
}
}
@keyframes CuteenPlanetMove {
0% {
transform: rotate(0);
}
to {
transform: rotate(360deg);
}
}
.Cuteen_DarkPlanet
#sun
position absolute
border-radius 100%
left 44%
top 30%
height 6rem
width 6rem
background #ffee94
box-shadow 0 0 40px #ffee94
// opacity 0
#moon
position absolute
border-radius 100%
left 44%
top 30%
position absolute
border-radius 100%
height 6rem
width 6rem
box-shadow -1.8em 1.8em 0 0.2em #fff
// opacity 1
// &:after
// position absolute
// left 42%
// top 30%
// width 6rem
// height 6rem
// border-radius 50%
// content ''
// background #ffef9e
// box-shadow 0 0 30px #ffef9e
.search
span
display none
.menus_item
a
text-decoration none
//按钮相关,对侧栏按钮做过魔改的可以调整这里的数值
// .icon-V
// padding 5px新建
[BlogRoot]\themes\butterfly\source\js\sun_moon.js,去除了冗余代码,去jquery1
2
3
4
5
6
7
8
9
10
11
12
13
14
15
16
17
18
19
20
21
22
23
24
25
26
27
28
29
30
31
32
33
34
35
36
37
38
39
40
41
42
43
44
45
46
47
48
49
50
51
52
53
54
55
56
57
58
59
60
61
62
63
64
65
66
67
68
69
70
71
72
73
74
75function switchNightMode() {
document.querySelector('body').insertAdjacentHTML('beforeend', '<div class="Cuteen_DarkSky"><div class="Cuteen_DarkPlanet"><div id="sun"></div><div id="moon"></div></div></div>'),
setTimeout(function () {
document.querySelector('body').classList.contains('DarkMode') ? (document.querySelector('body').classList.remove('DarkMode'), localStorage.setItem('isDark', '0'), document.getElementById('modeicon').setAttribute('xlink:href', '#icon-moon')) : (document.querySelector('body').classList.add('DarkMode'), localStorage.setItem('isDark', '1'), document.getElementById('modeicon').setAttribute('xlink:href', '#icon-sun')),
setTimeout(function () {
document.getElementsByClassName('Cuteen_DarkSky')[0].style.transition = 'opacity 3s';
document.getElementsByClassName('Cuteen_DarkSky')[0].style.opacity = '0';
setTimeout(function () {
document.getElementsByClassName('Cuteen_DarkSky')[0].remove();
}, 1e3);
}, 2e3)
})
const nowMode = document.documentElement.getAttribute('data-theme') === 'dark' ? 'dark' : 'light'
if (nowMode === 'light') {
// 先设置太阳月亮透明度
document.getElementById("sun").style.opacity = "1";
document.getElementById("moon").style.opacity = "0";
setTimeout(function () {
document.getElementById("sun").style.opacity = "0";
document.getElementById("moon").style.opacity = "1";
}, 1000);
activateDarkMode()
saveToLocal.set('theme', 'dark', 2)
// GLOBAL_CONFIG.Snackbar !== undefined && btf.snackbarShow(GLOBAL_CONFIG.Snackbar.day_to_night)
document.getElementById('modeicon').setAttribute('xlink:href', '#icon-sun')
// 延时弹窗提醒
setTimeout(() => {
new Vue({
data: function () {
this.$notify({
title: "关灯啦🌙",
message: "当前已成功切换至夜间模式!",
position: 'top-left',
offset: 50,
showClose: true,
type: "success",
duration: 5000
});
}
})
}, 2000)
} else {
// 先设置太阳月亮透明度
document.getElementById("sun").style.opacity = "0";
document.getElementById("moon").style.opacity = "1";
setTimeout(function () {
document.getElementById("sun").style.opacity = "1";
document.getElementById("moon").style.opacity = "0";
}, 1000);
activateLightMode()
saveToLocal.set('theme', 'light', 2)
document.querySelector('body').classList.add('DarkMode'), document.getElementById('modeicon').setAttribute('xlink:href', '#icon-moon')
setTimeout(() => {
new Vue({
data: function () {
this.$notify({
title: "开灯啦🌞",
message: "当前已成功切换至白天模式!",
position: 'top-left',
offset: 50,
showClose: true,
type: "success",
duration: 5000
});
}
})
}, 2000)
}
// handle some cases
typeof utterancesTheme === 'function' && utterancesTheme()
typeof FB === 'object' && window.loadFBComment()
window.DISQUS && document.getElementById('disqus_thread').children.length && setTimeout(() => window.disqusReset(), 200)
}修改
[BlogRoot]\themes\butterfly\layout\includes\head.pug,在文件末位加上一行1
2
3
4
5
6
7
8
9
10
11//- global config
!=partial('includes/head/config', {}, {cache: true})
include ./head/config_site.pug
include ./head/noscript.pug
!=fragment_cache('injectHeadJs', function(){return inject_head_js()})
!=fragment_cache('injectHead', function(){return injectHtml(theme.inject.head)})
+ // 白黑夜切换动画
+ include ./custom/sun_moon.pug修改
[BlogRoot]\themes\butterfly\layout\includes\rightside.pug,把原本的昼夜切换按钮替换掉1
2
3
4
5
6
7
8
9
10when 'translate'
if translate.enable
button#translateLink(type="button" title=_p('rightside.translate_title'))= translate.default
when 'darkmode'
if darkmode.enable && darkmode.button
- button#darkmode(type="button" title=_p('rightside.night_mode_title'))
- i.fas.fa-adjust
+ a.icon-V.hidden(onclick='switchNightMode()', title=_p('rightside.night_mode_title'))
+ svg(width='25', height='25', viewBox='0 0 1024 1024')
+ use#modeicon(xlink:href='#icon-moon')修改
[BlogRoot]\_config.butterfly.yml,引入一下js1
2
3inject:
bottom:
+ - <script src="/js/sun_moon.js" async></script> # 白黑夜切换动画重启项目并切换夜间模式即可看见效果
1
2
3
4# git bash
hexo cl && hexo g && hexo s
# vscode
hexo cl; hexo g; hexo s
引入 iconfont 自定义图标(店长)
点击查看教程
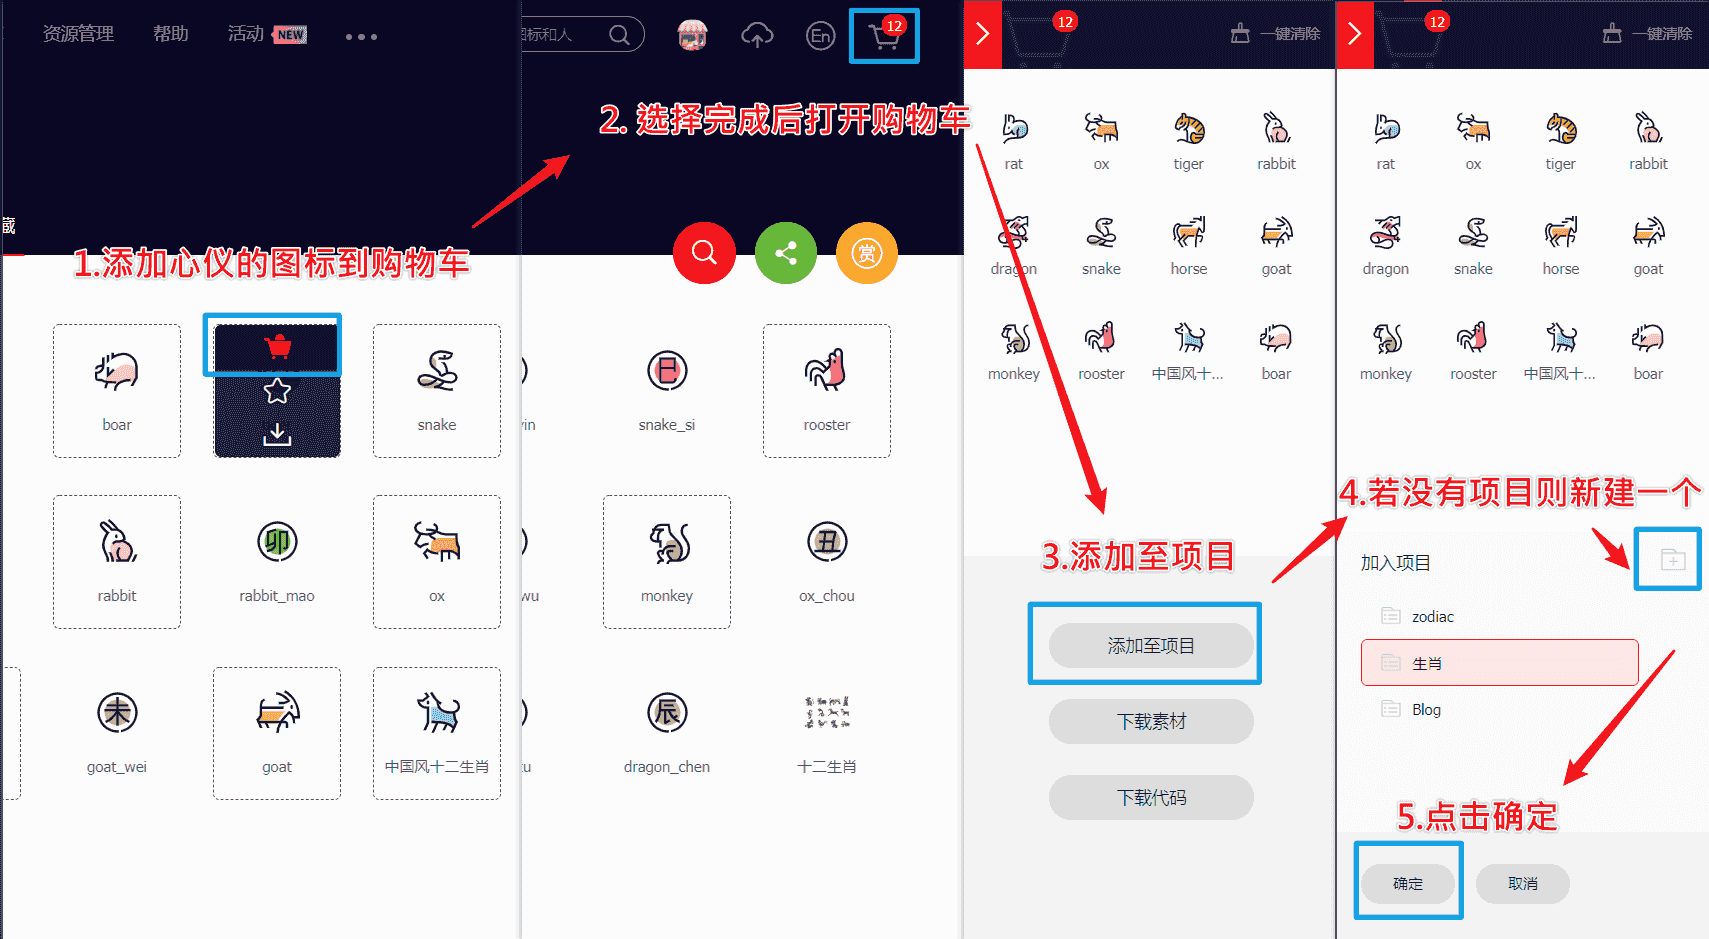
新建图标项目
访问阿里巴巴矢量图标库,注册登录。
搜索自己心仪的图标,然后选择添加入库,加到购物车。
选择完毕后点击右上角的购物车图标,打开侧栏,选择添加到项目,如果没有项目就新建一个。

可以通过上方顶栏
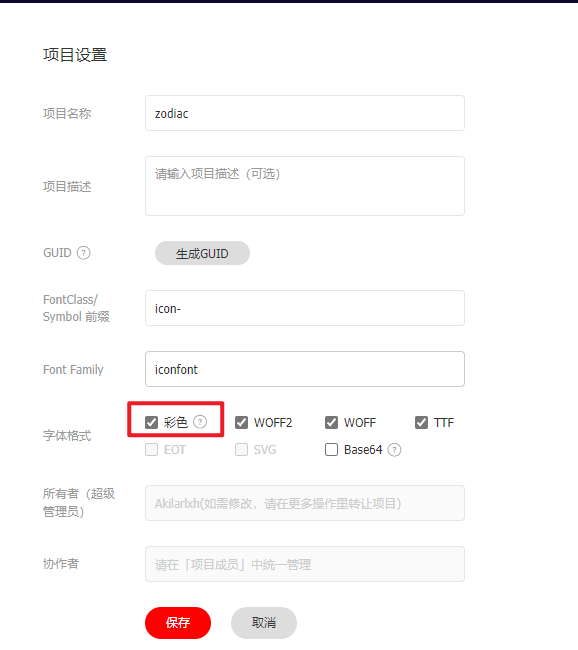
菜单->资源管理->我的项目,找到之前添加的图标项目。(现在的 iconfont 可以在图标库的项目设置里直接打开彩色设置,然后采用 fontclass 的引用方式即可使用多彩图标。但是单一项目彩色图标上限是40个图标,酌情采用。)

引入图标
线上引入方案,我使用的是官方文档中最便捷的font-class方案。这一方案偶尔会出现图标加载不出的情况。但是便于随时对图标库进行升级,换一下在线链接即可,适合新手使用。最新版本的iconfont支持直接在项目设置中开启彩色图标,从而实现直接用class添加多彩色图标。(推荐直接用这个即可)
首先获取引入的 js 地址
项目中每加入一个新图标,这里的地址就得重新生成,否则新加入的图标不生效。
在
[BlogRoot]\_config.butterfly.yml中的inject加入1
2
3
4
5
6# Inject
# Insert the code to head (before '</head>' tag) and the bottom (before '</body>' tag)
# 插入代码到头部 </head> 之前 和 底部 </body> 之前
inject:
bottom:
- <script async src="//at.alicdn.com/t/c/foxxxxxxxx.js"></script> # 阿里图标引入这里放入刚刚复制的地址,每加一个新图标都需要修改。
导航栏魔改
点击查看教程
- 需要前置:vue+element 样式
- 需要前置:夜间模式切换动画
- 需要前置:引入 iconfont 自定义图标

导航栏居中渐变色
在
[BlogRoot]\source\css\custom.css中引入如下css代码,然后在主题配置文件_config.butterfly.yml中引入该文件:1
2
3
4
5
6
7
8
9
10
11
12
13
14
15
16
17
18
19
20
21
22
23
24
25
26
27
28
29
30
31
32
33/*--------------------------------- 菜单居中 -------------------------------------*/
/* 一级菜单居中 */
#nav .menus_items {
position: absolute ;
width: fit-content ;
left: 50% ;
transform: translateX(-50%) ;
}
/* 子菜单横向展示 */
#nav .menus_items .menus_item:hover .menus_item_child {
display: flex ;
}
/* 这里的2是代表导航栏的第2个元素,即有子菜单的元素,可以按自己需求修改 */
.menus_items .menus_item:nth-child(3) .menus_item_child {
left: -40px;
}
.menus_items .menus_item:nth-child(4) .menus_item_child {
left: -100px;
}
.menus_items .menus_item:nth-child(5) .menus_item_child {
left: -100px;
}
/* 导航栏颜色 */
#page-header.nav-fixed #nav {
background: linear-gradient(60deg, #ffd7e4 0, #c8f1ff 93%);
opacity: 0.95;
backdrop-filter: var(--backdrop-filter);
}
[data-theme="dark"] #page-header.nav-fixed #nav {
background: rgba(0, 0, 0, 0.95) ;
}
/*-------------------------- 菜单居中end -----------------------------*/此处的
css实现了两个作用:菜单栏居中、子菜单横向显示。其中子菜单横向显示要根据自己的实际情况来改,例如你的以及菜单的第2个选项中有子菜单,那就要加一项调节第2个选项中的子菜单,这个具体调节多少要根据你的具体情况为准,可以自己慢慢调到中间。
导航栏多色动态图标(店长)
详见:糖果屋微调合集
需要前置教程引入 iconfont 自定义图标
替换
[BlogRoot]\themes\butterfly\layout\includes\header\menu_item.pug为以下代码,本方案默认使用观感最佳的悬停父元素触发子元素动画效果,默认动画为faa-tada。注意:可以把之前的代码注释掉,再在后面加上如下代码,以便于回滚,此代码在butterfly 4.12.0上可以运行并保留 hide 字段隐藏子菜单的功能,其他版本自行测试。代码的本质并不复杂,就是扫描配置文件对应的配置项,然后根据||的分割标志筛选出对应的图标名称、对应链接等,从而渲染出 html 页面。1
2
3
4
5
6
7
8
9
10
11
12
13
14
15
16
17
18
19
20
21
22
23
24
25
26
27
28
29
30
31
32
33
34
35
36
37
38
39
40
41
42
43
44
45
46if theme.menu
.menus_items
each value, label in theme.menu
if typeof value !== 'object'
.menus_item
- const valueArray = value.split('||')
a.site-page.faa-parent.animated-hover(href=url_for(trim(value.split('||')[0])))
if valueArray[1]
i.fa-fw(class=trim(valueArray[1]))
- var icon_value = trim(value.split('||')[1])
- var anima_value = value.split('||')[2] ? trim(value.split('||')[2]) : 'faa-tada'
if icon_value.substring(0,2)=="fa"
i.fa-fw(class=icon_value + ' ' + anima_value)
else if icon_value.substring(0,4)=="icon"
svg.icon(aria-hidden="true" class=anima_value)
use(xlink:href=`#`+ icon_value)
span=' '+label
else
.menus_item
- const labelArray = label.split('||')
- const hideClass = labelArray[3] && trim(labelArray[3]) === 'hide' ? 'hide' : ''
a.site-page.group.faa-parent.animated-hover(class=`${hideClass}` href='javascript:void(0);')
if labelArray[1]
- var icon_label = trim(label.split('||')[1])
- var anima_label = label.split('||')[2] ? trim(label.split('||')[2]) : 'faa-tada'
if icon_label.substring(0,2)=="fa"
i.fa-fw(class=icon_label + ' ' + anima_label)
else if icon_label.substring(0,4)=="icon"
svg.icon(aria-hidden="true" class=anima_label)
use(xlink:href=`#`+ icon_label)
span=' '+ trim(labelArray[0])
i.fas.fa-chevron-down
ul.menus_item_child
each val,lab in value
- const valArray = val.split('||')
li
a.site-page.child.faa-parent.animated-hover(href=url_for(trim(val.split('||')[0])))
if valArray[1]
- var icon_val = trim(val.split('||')[1])
- var anima_val = val.split('||')[2] ? trim(val.split('||')[2]) : 'faa-tada'
if icon_val.substring(0,2)=="fa"
i.fa-fw(class=icon_val + ' ' + anima_val)
else if icon_val.substring(0,4)=="icon"
svg.icon(aria-hidden="true" class=anima_val)
use(xlink:href=`#`+ icon_val)
span=' '+ lab以下是填写示例,在
[BlogRoot]\_config.butterfly.yml中修改。icon-xxx字样的为iconfont的symbol引入方案的id值,可以在你的iconfont图标库内查询,其中hide属性也是可以用的。1
2
3
4
5
6
7
8
9
10
11
12
13
14menu:
首页: / || icon-HOME || faa-tada
时间轴: /archives/ || icon-mianxingshijianzhou || faa-tada
文章||icon-fengche||faa-tada || hide:
标签: /tags/ || icon-tag || faa-tada
分类: /categories/ || icon-fenlei || faa-tada
清单||icon-list||faa-tada || hide:
音乐: /music/ || fas fa-music
电影: /movies/ || fas fa-video
文章统计: /charts/ || icon-zhifeiji || faa-tada
个人 || icon-xiuxian || faa-tada || hide:
闲言碎语: /bb/ || icon-shejiaoxinxi || faa-tada
友链: /link/ || icon-gerenzhongxin || faa-tada
关于: /about/ || icon-aixin || faa-tada要注意的是,这里的动态图标是
svg.icon的标签,因此上面调节.iconfont的css并不使用,我们需要在自定义样式文件custom.css里加上一些样式来限制图标的大小和颜色等,具体大小自行调节。1
2
3
4
5
6
7
8
9/*------- 导航栏多色图标 --------*/
svg.icon {
width: 1.28em;
height: 1.28em;
vertical-align: -0.15em;
fill: currentColor;
overflow: hidden;
}
/*------- 导航栏多色图标end --------*/重启项目即可看到效果:
1
2
3
4
# git bash
hexo cl && hexo g && hexo s
# vscode
hexo cl; hexo g; hexo s
导航栏右侧搜索和切换夜间模式
- 需要前置:vue+element 样式
- 需要前置:夜间模式切换动画
- 需要前置:引入 iconfont 自定义图标
重构导航栏:修改
[blogRoot]\themes\Butterfly\layout\includes\header\nav.pug,替换成下面的代码,其中图标啥的自己改一下:1
2
3
4
5
6
7
8
9
10
11
12
13
14
15
16
17
18
19
20
21
22
23
24
25
26
27
28
29
30
31
32nav#nav
span#blog-info
a(href=url_for('/') title=config.title)
if theme.nav.logo
img.site-icon(src=url_for(theme.nav.logo))
if theme.nav.display_title
span.site-name=config.title
#menus
!=partial('includes/header/menu_item', {}, {cache: true})
//- 这两行是导航栏显示标题用的
center(id="name-container")
a(id="page-name" href="javascript:scrollToTop()") PAGE_NAME
#nav-right
if (theme.algolia_search.enable || theme.local_search.enable || theme.docsearch.enable)
#search-button
//- a.site-page.social-icon.search
//- i.fas.fa-search.fa-fw
a.search.faa-parent.animated-hover(title="检索站内任何你想要的信息")
svg.faa-tada.icon(style="height:24px;width:24px;fill:currentColor;position:relative;top:6px" aria-hidden="true")
use(xlink:href='#icon-sousuo')
span=' '+_p('search.title')
//- 暗黑模式按钮
a.sun_moon.faa-parent.animated-hover(onclick='switchNightMode()', title=_p('rightside.night_mode_title') id="nightmode-button")
svg.faa-tada(style="height:25px;width:25px;fill:currentColor;position:relative;top:7px", viewBox='0 0 1024 1024')
use#modeicon(xlink:href='#icon-weather-color_moon-stars')
#toggle-menu
a
i.fas.fa-bars.fa-fw标题增强:在
custom.css加入如下代码,其中var(--theme-color)替换成你自己的主题色:1
2
3
4
5
6
7
8
9
10
11
12
13
14
15
16
17
18
19
20
21
22
23
24
25
26
27
28
29
30
31
32
33
34
35
36
37
38
39
40
41
42
43
44
45
46
47
48
49
50
51
52
53
54
55
56
57
58
59
60
61
62
63
64
65
66
67
68
69
70
71
72
73
74
75
76
77
78
79
80
81
82
83
84
85
86
87
88
89
90
91
92
93
94
95
96
97
98
99
100
101
102
103
104
105
106
107
108
109
110
111
112
113
114/*--------------------------- 导航栏增强 ----------------------------*/
/* 标题增强 */
#site-name::before {
opacity: 0;
background-color: var(--theme-color) ;
border-radius: 8px;
-webkit-border-radius: 8px;
-moz-border-radius: 8px;
-ms-border-radius: 8px;
-o-border-radius: 8px;
transition: 0.3s;
-webkit-transition: 0.3s;
-moz-transition: 0.3s;
-ms-transition: 0.3s;
-o-transition: 0.3s;
position: absolute;
top: 0 ;
right: 0 ;
width: 100%;
height: 100%;
content: "\f015";
box-shadow: 0 0 5px var(--theme-color);
font-family: "Font Awesome 6 Free";
text-align: center;
color: white;
line-height: 34px; /*如果有溢出或者垂直不居中的现象微调一下这个参数*/
font-size: 18px; /*根据个人喜好*/
}
#site-name:hover::before {
opacity: 1;
scale: 1.03;
}
#site-name {
position: relative;
font-size: 1.3em; /*一定要把字体调大点,否则效果惨不忍睹!*/
}
/* 顶栏常驻 */
.nav-fixed #nav{
transform: translateY(58px);
-webkit-transform: translateY(58px);
-moz-transform: translateY(58px);
-ms-transform: translateY(58px);
-o-transform: translateY(58px);
}
#nav{
transition: none;
-webkit-transition: none;
-moz-transition: none;
-ms-transition: none;
-o-transition: none;
}
/* 导航栏显示标题 */
#page-name::before {
font-size: 18px;
position: absolute;
width: 100%;
height: 100%;
border-radius: 8px;
color: white ;
top: 0;
left: 0;
content: "回到顶部";
background-color: var(--theme-color);
transition: all 0.3s;
-webkit-transition: all 0.3s;
-moz-transition: all 0.3s;
-ms-transition: all 0.3s;
-o-transition: all 0.3s;
opacity: 0;
box-shadow: 0 0 3px var(--theme-color);
line-height: 45px; /*如果垂直位置不居中可以微调此值,也可以删了*/
}
#page-name:hover:before {
opacity: 1;
}
#name-container {
transition: all 0.3s;
-webkit-transition: all 0.3s;
-moz-transition: all 0.3s;
-ms-transition: all 0.3s;
-o-transition: all 0.3s;
}
#name-container:hover {
scale: 1.03;
}
#page-name {
position: relative;
padding: 10px 30px; /*如果文字间隔不合理可以微调修改,第二个是水平方向的padding,第一个是垂直的*/
}
#nav{
padding: 0 20px;
}
/* 修复滚动显示标题居中 */
center#name-container {
position: absolute ;
width: fit-content ;
left: 42% ;
}
@media screen and (max-width: 768px) {
center#name-container {
display: none;
}
}
/* 导航栏右面图标黑白夜开关等*/
#nightmode-button {
padding-left: 12px;
}
/*--------------------------- 导航栏增强 end ----------------------------*/显示标题:新建
[BlogRoot]\source\js\nav.js,并写入如下代码:1
2
3
4
5
6
7
8
9
10
11
12
13
14
15
16
17
18
19
20
21
22
23
24
25
26document.addEventListener('pjax:complete', tonav);
document.addEventListener('DOMContentLoaded', tonav);
//响应pjax
function tonav() {
document.getElementById("name-container").setAttribute("style", "display:none");
var position = $(window).scrollTop();
$(window).scroll(function () {
var scroll = $(window).scrollTop();
if (scroll > position) {
document.getElementById("name-container").setAttribute("style", "");
document.getElementsByClassName("menus_items")[1].setAttribute("style", "display:none!important");
} else {
document.getElementsByClassName("menus_items")[1].setAttribute("style", "");
document.getElementById("name-container").setAttribute("style", "display:none");
}
position = scroll;
});
//修复没有弄右键菜单的童鞋无法回顶部的问题
document.getElementById("page-name").innerText = document.title.split(" | Rean's Blog")[0];
}
function scrollToTop() {
document.getElementsByClassName("menus_items")[1].setAttribute("style", "");
document.getElementById("name-container").setAttribute("style", "display:none");
btf.scrollToDest(0, 500);
}将
nav.js引入_config.butterfly.yml的 inject 部分中(放在最后一个)1
2
3
4
5
6inject:
bottom:
+ - <script src="https://npm.elemecdn.com/jquery@latest/dist/jquery.min.js"></script> # jQuery
...
...
+ - <script src="/js/nav.js"></script> # 回到顶部重启项目:
1
2
3
4
# git bash
hexo cl && hexo g && hexo s
# vscode
hexo cl; hexo g; hexo s
先修改到导航栏,敬请期待下面的魔改教程总结!😋😋😋